Before You Install Your Cabinet
Compliance begins from the minute you unwrap your flammable liquids cabinet. Follow these guidelines for a hassle-free installation.
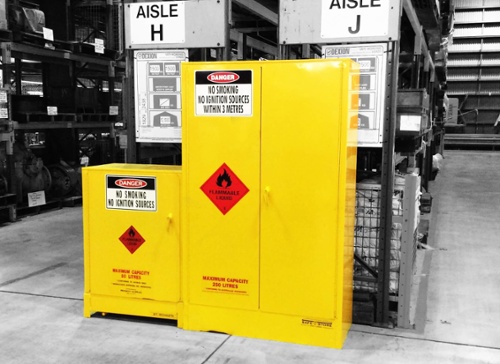
Location
- Select an appropriate location that is safe, compliant and convenient for staff to access it.
- Make sure the cabinet location does not impede emergency exits or evacuation routes.
- If packages are going to be opened in your store, you must install eye wash facilities (AS 4775) and water for hand washing within 2m – 10m of your flammable cabinet.
- Place your cabinet at least 10 metres from another aggregate quantity (if applicable). Ensure that you’re not exceeding maximum aggregate quantities for flammable liquids. Maximum aggregate quantities are: Ground floor locations 850L per 250m2; other floor locations 250L per 250m2
Site Preparation
- Check the site is flat, level and capable of holding the weight of the filled Class 3 cabinet.
- Ensure that any ignition sources (power points, industrial heat, tools that could create a spark etc.) are at least 3 metres from your cabinet.
- Clear and clean the placement site, disposing of rubbish, combustible materials and any other potential hazards.
- Keep incompatible substances away from the cabinet, as staff handling the products may be putting themselves at risk of a chemical reaction.
Installation
- Using a trolley or stair lifter, retrieve the flammable liquids cabinet from the delivery area (leaving the packaging on.) Take the flammable cabinet to the installation location.
- Carefully unwrap the cabinet and remove it from the wooden pallet.
- The cabinet will already be equipped with footing that allows it to be put in place on the flat, even surface with little to no fuss.
- Position the flammable cabinet in the required location, again ensuring that no ignition sources are within the area.
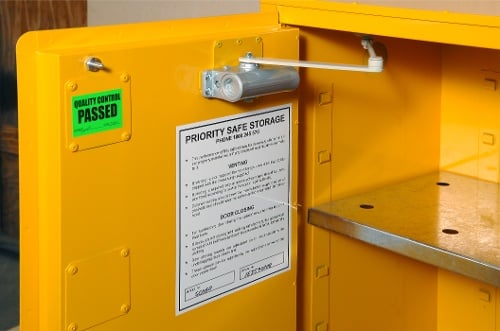
- Configure the perforated shelving to suit your requirements. To adjust, simply lift up the shelf from the lugs, which are inserted into the cabinet interior wall. Put the lugs in the new position and place the shelf securely on top.
IMPORTANT: If you have also purchased a document holder, attach it to the side of your Class 3 cabinet and fill with the relevant Safety Data Sheets.
Door Closing System
- To ensure that the sequential door closing system works correctly, the flammable liquids cabinet must be installed on a level base.
- If doors are not closing and latching correctly, adjust the mechanism first. Then, if still not operating correctly, level the cabinet with packers.
- These door closing speeds can be changed by using the adjustment screw on the hydraulic door closer itself.
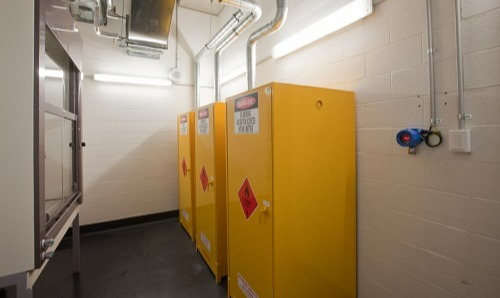
Venting
- If venting is not required on your flammable liquids storage cabinet, the vent bungs should be kept tightly capped with the metal bung plugs supplied.
- If venting is required only an approved venting system should be used and fitted according to the requirements of your local regulatory authority. You can find more information on how to ventilate dangerous goods storage cabinets by downloading our FREE safety cabinet ventilation guide.
- Flammable cabinet venting should never be manifolded through a series of dangerous goods storage cabinets. A ventilation system for a flammable cabinet must never be connected to a standard laboratory hood.
Post-Installation Check
- Check that the cabinet has not suffered damage during the moving or installation process.
- Inspect the doors to ensure that they are closing tightly and in sequence.
- Make sure that all dangerous goods and hazard signage is in place.
Maintenance
- Create a regular inspection and maintenance schedule to ensure your flammable liquids cabinet stays compliant.
- Make sure that any chemical leaks or spills within the cabinet are cleaned up immediately. If any flammable liquids spill into the sump of the cabinet, the floor of the cabinet must be removed, so the sump can be cleaned out immediately.
- Don’t use any tools or equipment around the cabinet, including mechanical pumps to clean out the spill sump. Tools, equipment and devices may spark the ignition of flammable vapours.
- Keep containers clean and free of residue, stacked neatly and safely.
- Check that signage is always visible and in good condition.
- Regularly check the doors to ensure that the self-closing, self-latching door mechanism is working correctly.
REMEMBER: If flammable liquids are left in the sump, they will start to fume. This can lead to asphyxiation and health issues in workers. Unclean sumps will create also serious chemical hazards including fire or explosion, if fumes come near an ignition source.
Video tutorials:
Watch Storemasta's video tutorials to find out how to use and maintain your equipment.
Further resources:
Click on the below links for more information about flammable liquids storage indoors.
- Developing An Inspection Checklist For Your Flammable Liquids Cabinet
- 4 Places You Should Never Put Your Flammable Liquid Storage Cabinet
- Do Flammable Cabinets Need To Be Self-Closing?
Get in touch:
Need some more advice on the installation or use of your flammable liquids cabinet? It’s easy to get in touch with our Storemasta team. Connect with us over the phone or online to learn more about reducing flammable liquids risk in your workplace.
