When a HAZCHEM incident occurs at work, it’s essential that evidence gathering occurs as quickly as possible. Physical evidence of an incident can quickly deteriorate — or even be erased — if the proper precautions aren’t put in place. This post focuses on the HAZCHEM incident investigation. We’ll offer tips for preserving the scene and securing the physical evidence so you can determine what really happened – and how to prevent it occurring again.
What Does HAZCHEM Mean?
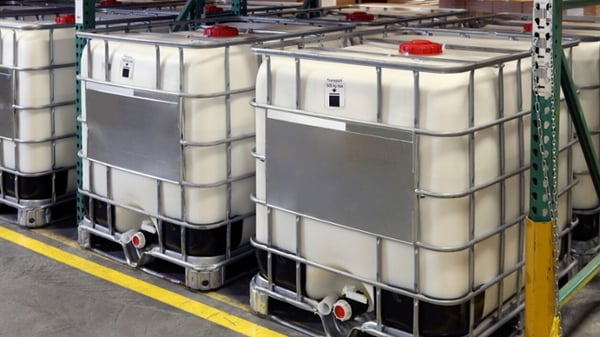
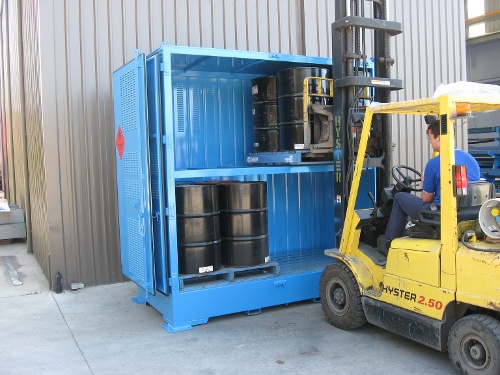
HAZCHEM refers to hazardous chemicals, which are substances that pose risk to those who are working with them. Many businesses carry, store, use or generate hazardous chemicals, which may create risk for people, property and also the environment. Therefore, a range of controls must be implemented to ensure HAZCHEM are stored and handled safely to reduce the likelihood and impact of a dangerous incident.
HAZCHEM refers to hazardous chemicals, which must be controlled to reduce risk.
What is a HAZCHEM Incident?
When discussing HAZCHEM incidents, we’re referring to the broad range of safety issues that may arise when working with hazardous substances. These incidents could include fire involving flammable substances, toxic chemical spills or human harm due to exposure to dangerous substances.
The risks associated with HAZCHEM incidents are influenced by countless factors including the type and quantity of chemical onsite, the safety precautions and controls that the business has in place, how close residential areas or environmental areas are to the incident site, and how quickly the situation is addressed.
Necessary Steps for HAZCHEM Evidence Gathering
There are some basic steps to take when conducting evidence gathering for hazardous chemical accidents or incidents in the workplace. These steps include the securing of the scene, collecting and documenting evidence, and obtaining physical evidence to assist the HAZCHEM investigation and determine root cause.
Step 1: Securing the Scene for Safety
Your first step is to secure the area and ensure the safety of everyone at the scene. Many HAZCHEM incidents are actually notifiable incidents — so they must be reported to the WHS Regulator in your state or territory immediately. Under WHS Regulations the site of a notifiable incident must be preserved until the WHS inspector arrives.
Preserving the scene involves:
- Roping off the area and restricting access.
- Ensuring nothing is touched, moved, changed, cleaned up, or thrown away.
- Prohibiting all work activities that aren’t directly related to preserving human life, property, or the environment.
If you are conducting your own incident investigation you will need to wait until the incident site is released by the WHS Inspectors.
REMEMBER: Gathering physical evidence from a scene where workers have been killed or seriously injured can be stressful for everyone involved. Be compassionate and respectful of the surviving workers who are likely to be suffering from Post-traumatic Stress Disorder (PTSD).
Step 2: Collect Evidence Through Observation & Record
Once the incident site has been released by your WHS Regulator (and is safe to enter) you can begin gathering the physical evidence.
We suggest approaching the scene as follows to collect physical evidence:
- Make a holistic appraisal of incident site - when you first enter the scene look at the overall environment. Is the area a disorganised mess? Or does it look no different to a regular shift? Take a mental note of things like housekeeping, heat, noise, and obstructions.
- Sketch a map, then video the scene - record your observations by sketching a map of the scene. A hand drawn map of the incident scene helps you put location points in perspective, plus memories fade fast. Your own sketches also serve as visual triggers of your response to the scene. Use video to support your records.
- Walk around and photograph key locations - these initial photos are to support your sketches and illustrate the location of machinery, chemicals, and people.
- Take notes to accompany each photo - smartphone technologies are so advanced, and it’s easy to walk away with literally thousands of photos. Take the time to frame your shots carefully, take 2 of each item rather than 10, and make handwritten notes to support each photo.
- Photograph/video individual pieces of evidence - now it is time to take closer shots of evidence. Things like damaged PPE, the settings on machinery, the placement of safety guards, or broken chemical containers. Again, make notes as you photograph each item.
MPORTANT: The scene of a HAZCHEM incident may still contain chemical residues or unsafe airborne concentrations of hazardous substances. Always protect your own safety as well as that of the investigation team when gathering physical evidence.
Step 3: Obtain Physical Evidence
When collecting items and samples for testing you should first photograph and record the placement and settings of the items, then individually bag/label each item so they do not become lost or damaged by another item.
We suggest considering the following factors when obtaining physical evidence, at a minimum:
Machinery, Tools, PPE
Inspect the machinery and equipment that was being used at the time of the incident. You’ll want to record any settings, the placement of safety guards, and their tag/test dates. This is especially important for power tools. You could also look for makeshift implements or indications of equipment being used incorrectly.
An incident, such as a fire, could be sparked if faulty equipment is used near flammable materials.
Chemicals and Substances
What materials, chemicals and substances were involved in the incident? You’ll immediately be accessing the register of hazardous chemicals and checking containers for correct labelling and signage. Record the condition and specifications of storage cabinets and decanting equipment, you might also check the expiry dates. Unknown substances may require isolation, and you may also want to collect samples for testing.
Personal Protective Equipment (PPE), Clothing, Personal Items
The clothing, personal protective equipment (PPE), and personal property of a worker can be a contributing to factor to dangerous incidents. Consider what a worker was wearing in addition to their company issued gloves, mask, and uniform. A watch or pair of earrings may have increased the severity of a chemical burn. Did their PPE fail in any way? Burnt or damaged items should be photographed and/or removed for testing.
Broken Tools, Refuse, and Debris
If any hands tools, electrical equipment, or machinery was defective or damaged during the incident you should collect these items. It could be the shards from a broken lab beaker, fragments and bits from componentry that fell from a machine, or pieces of a cracked chemical container. Bigger items may be photographed, and smaller pieces may be extracted for testing.
IMPORTANT: It is probably beyond the scope of an internal investigation to evaluate burn marks, tracks, indentations, flame patterns, and human tissue. These should be preserved for testing by an external investigation team or the WHS Inspector.
What to Do with Physical Evidence Collected?
Have you had a dangerous HAZCHEM incident at your workplace? Why not download our free eBook Key steps in a HAZCHEM incident investigation to help you conduct your own internal investigation. The eBook is written in clear business English and demonstrates the investigation process using plenty of real-world examples — relevant to workplaces just like yours. Grab your free copy today to find out more about the collection of real evidence to assist your HAZCHEM investigations.