When you’re facing a small chemical spill in your business, time is of the essence. While spilled cleaning chemicals, petrol, paint or even garden chemicals may not immediately appear to be a safety issue, hazardous substances can fume, ignite, corrode or seep into soil and waterways as soon as they’ve been released from their containers.
Cleaning up the spill as quickly and effectively as possible is an important part of minimising any potential hazards. But what’s the best way to attack hazardous spillage if it occurs in your workplace? Our post will help you get your workplace back to business by highlighting 5 key considerations your team should make when cleaning-up a small chemical spill. We’ll list some of the hazards you’ll need to control during the clean-up process, along with the items you’ll need in your spill kit.
1. Who Should Tend To The Small Chemical Spill?
If you’re new to the world of dangerous goods and hazardous chemicals, you may not be aware of all the hazards that particular chemical products pose. When any staff member deals with chemicals in the workplace, they need to be equipped with tailored training that helps them understand the hazards associated with the chemical onsite, as well as the best practice for handling and storing them.
In addition to this, authorised staff members should also undertake spill clean-up training. There are a multitude or organisations who host both inhouse and online courses, so your staff can be better prepared to deal with the challenges that may appear when cleaning up the spillage.
Make sure that all staff in your organisation follow strict procedures on how to notify the spill response team when a leak or spill is observed.

The only staff tending to the spill should be ones that are authorised to do so and have received the proper spill training.
Have the staff onsite at the time of the spill carefully cordon off the spill zone. This is so no other staff members, contractors or customers walk into or near the spillage. Without roping off the area and putting hazard signage in place, pedestrian traffic will only spread the liquid chemicals, and their harmful vapours, further throughout the workplace.
2. What Chemical Is It?
Your spill assessment is one of the first steps that your team will have to take when tending to the clean-up. However, it’s one of the most important considerations as this will determine how you manage the clean-up and what type of equipment you’ll have to use.
The Safety Data Sheet for the spilled substance is your first port-of-call. In this document, you’ll be able to quickly identify the dangerous goods class of the chemical, as well as the hazards that may be present.
The accurate assessment of the chemical spill will also include your team’s ability to determine the volume of spilled liquids. How much liquid has leaked or spilled, and how difficult it will be to contain and clean-up, will affect the following steps in the clean-up procedure.
IMPORTANT: We strongly suggest that you keep your Safety Data Sheets in a secure, highly visible and easily accessible location. Using an SDS folder and sturdy document holder to house your sheets means that there’s less chance of the documents going missing, and staff are able to gain access to them in the shortest possible timeframe.
3. Controlling Hazards
Your Safety Data Sheet will have given you information about the hazards that the spill may pose. Before attempting the clean-up, it’s important that your spill response team quickly control any hazards onsite.
Hazards associated with even small chemical spills may include:
- Fire, flashback and explosion – when Class 3 liquids leak or spill and the flammable vapours meet an ignition source
- Contamination of soil and water – if toxic or corrosive chemicals spill on bare earth on an unsealed floor, they could travel down drains and out into the natural environment – or simply seep into the earth below, contaminating soil and water
- Chemical burns, eye damage, breathing problems – exposure to harmful chemicals can have an immediate impact on the health of your staff. Many hazardous chemicals create serious health issues for exposed workers, which is why the fast decontamination of skin and eyes is essential for maintaining health and safety.
- Damage to property, vehicles and equipment – if corrosive chemicals are spilled at work, they can attack a range of materials, including metal. The longer the substance is left on the surface, the worse the corrosion will be.
How Would You Control A Chemical Hazard?
A basic example of controlling a chemical hazard caused by a Class 3 liquid spill is below:
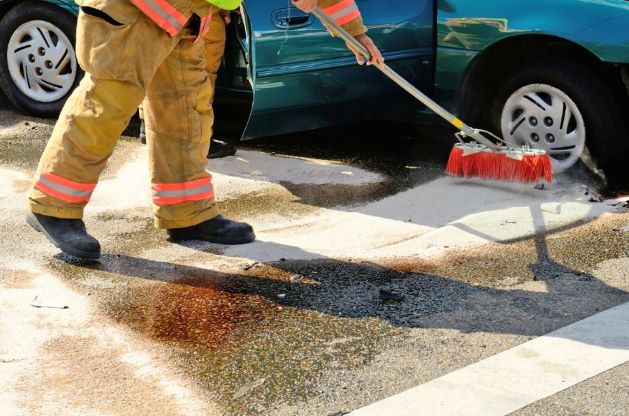
A forklift has started leaking fuel into your yard, dropping several litres of fluid. However, that fluid is diesel and the hazards associated with that spillage include the possibility of ignition, with vapours being emitted from the chemical. This will require the shutdown of any types of workplace ignition sources (machinery, electrical equipment, devices, hot work etc), and a range of absorbents that are chemically compatible with this Class 3 liquid. You’ll need to plug the leaking tank, as well as contain the spillage and absorb the spilled diesel. This will require your staff to use the appropriate spill kit, with a range of materials suitable for those tasks.
REMEMBER: Flammable and combustible liquids can generally be cleaned up with two types of spill kits. This includes Chemical Spill Kits, which are suitable for use with hazardous substances, and the Oil & Fuel Spill Kits, which are designed to absorb these hydrocarbon substances in a wet environment.
4. What Equipment and Materials Are Needed?
Before your staff throw some rags on a chemical puddle they found on the workshop floor, you’ll need to be adequately prepared to manage the entire situation.
This means that some prep work will have to be done before you can effectively manage even the smallest hazardous chemical spillage in your workplace.
Make sure that you have the following equipment and materials in your spill kits:
- The appropriate PPE including footwear (and breathing apparatus, if required)
- Spill kits suitable for the type and quantity of chemical that has been released
- A wheelie bin or large bucket to assist with the transfer of waste
- Hazard signage or bollards to cordon off the spill zone
- The Safety Data Sheet for each chemical that has been spilt
- Register of hazardous chemicals to check for chemical incompatibilities
- Spill kit instructions
For small chemical spills, you should have enough materials onsite to handle the situation — as long as your staff have maintained your stock of spill kits. We suggest that you develop a regular spill kit inspection checklist, so you’re never caught short when scrambling for materials during a clean-up.
It’s also essential that your spill response team is trained in how to properly put on and take off their PPE.
The requirements for PPE will vary depending on the type of chemicals that you have onsite, as well as the severity of the spill. Liquids and fumes can quickly affect human health, so it’s important to dress in the appropriate PPE before you clean-up the site — and consider breathing apparatus to prevent respiratory issues.
REMEMBER: If you’re not sure that the materials in your spill kit are a suitable absorbency or compatible with your chemicals, then have a chat with our friendly Dangerous Goods Specialists who can assist with your spill kit enquiries.
5. How Do You Clean-Up The Spill?
There are a multitude of steps involved with the successful clean-up of a minor spill in the workplace.
We’ve already covered:
- Isolating the spill area
- Notifying the spill team
- Putting on PPE
- Identifying and isolating hazards
- Accessing the correct spill kits
The next steps in the clean-up with rely heavily on the absorbents in your spill kit.
The actual process of cleaning up a small spill relies heavily on your spill kit absorbents.
First, you must stop the spill by using items in your kit —such as pads or pillows — that can plug leaking equipment, machinery or chemical containers. Also remember to plug any open drains that the chemical may travel into.
The next step is to contain the spillage, so it doesn’t travel any further through the workplace. This can be achieved by using booms and mini-booms, which can be placed around the perimeter of the spill.
Once the spill has been stopped and contained, you can then start soaking up the chemicals using pillows, pads, wipes or floor sweep. If the spill is on the floor, you may choose to use pads or pillows. If it’s sprayed or leaked over equipment or onto walls, you may choose to wipe down the affected surfaces.
If you’re using a compatible floor sweep (a granulated absorbent), you should sprinkle the absorbent materials over the spill. Wait for the absorbent material to soak up the chemical, then using a firm broom, start sweeping up the granules from the outside of the spill, inwards. You can then use a dustpan and brush, or a shovel, to put the soiled granules into the waste bags.
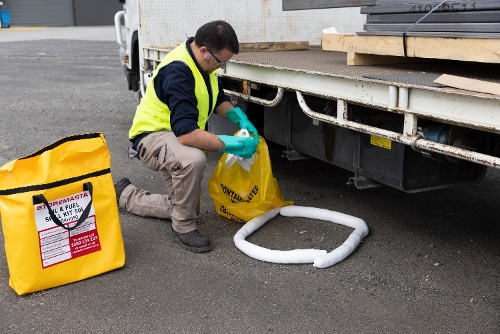
Use booms to contain your hazardous chemical spillage.
During the clean-up process, make sure that staff are placing soiled absorbents into the bags provided in the spill kit. These bags must then be securely tied off with the waste bag ties that are provided in your spill kit.
After collecting and securing the waste, you can then place these soiled materials into the wheelie bin, ready for the safe disposal of the chemicals and resulting waste.
If you’ve had to transfer leaking chemical containers into new ones, make sure that the new containers are labelled, with tight-fitting lids. Decontaminate the old containers before sending to the waste station, to reduce the risk of a hazard occurring during the waste disposal process.
After the spill clean-up has been completed, staff can then decontaminate the area, to remove chemical residue and fumes.
After the site has been cleaned and decontaminated, then staff can carefully remove their PPE.
REMEMBER: Your PPE is of the utmost importance when you’re part of a spill response team. Make sure the PPE is laundered after use, and that it is placed back in a dedicated PPE cabinet so staff have easy access when the next leak or spill occurs.
The Last Consideration In The Clean-Up Process
The last step in the spill clean-up process is the reporting and assessment of the incident. This allows your business to better understand why the spill occurred, and how it could be prevented in the future. By reporting and assessing the incident, your staff will have a deeper understanding of how they can improve chemical safety onsite.
Another important aspect of cleaning up a spill, is making sure that the spill kit is replenished and ready for use. We recommend implementing a regular spill kit inspection, so you can make sure that your kit is fully stocked and in good working order. You can also grab a copy of our handy spill kit checklist, which will help you tick off your compliance obligations. Get your copy today by clicking on the image below.
